
Easy Kitchen Storage:
1. Max Out Cabinet Doors
Use the insides of your cabinet doors for storage. Stick a corkboard, magnetic board, or peg racks there to hold shopping lists, small tins of spices, measuring cups, or small cooking utensils.
2. Say It with Chalk
Chalkboard paint is a low-cost solution for adding labels to almost anything in the kitchen. Use it to organize spice jars, containers filled with baking supplies, shelf fronts, and more.
3. Look Up
Capture unused space over a door or window by hanging a basic shelf above the frame and using it to store off-season dishes, rarely used serving pieces, or bottles of wine.
4. Grab Some Hang Time
Bulky pots and pans take up a lot of room; free up valuable drawer space by hanging them from a ceiling-mount rack. If that's not possible, use hooks to mount them to the wall for artistic effect.
5. Transform Towel Bars
Metal towel bars can serve a new purpose in the kitchen when you install them inside a cabinet or pantry door. Use the bar to store lids to pots and pans, and you'll never again dig through a drawer looking for the right size.
6. Claim Wasted Space
Over-the-door storage solutions maximize otherwise wasted space. Use small metal or plastic racks with baskets and bins inside cabinet doors, or choose longer versions with pockets or shelves for pantry doors.
7. Boost Storage with Baskets
Baskets are a pretty way to keep messes out of sight. Use them on shelves or in cabinets to organize linens, snacks, utensils, and more.
8. Tame Unruly Drawers
Corral plastic and zip-top bags by storing them in metal tissue holders. The bins are perfect for organizing a drawer, but are attractive enough to sit on a counter.
9. Rethink the Backsplash
Turn your backsplash into knife storage by installing a magnetic strip. This simple solution frees up counter space and keeps your cutting tools handy.
10. Organize Under the Sink
Control undersink clutter by using clear plastic bins to store like items. Label each container so it's easy to find and return the tools you need.
11. Free Up Those Drawers
Don't let a lack of drawer space cramp your style. Stash silverware in a pretty mug or container. Best of all, this idea makes it easy to move utensils from counter to table when entertaining.
12. Try a Temporary Fix
There are times when an oversize cabinet isn't helpful. To keep upright items, like cutting boards and baking sheets, organized, turn inexpensive tension rods into temporary cabinet dividers.
13. Call on Blank Walls
Stash cooking utensils, narrow boxes, or other small accessories in magazine racks installed on the wall or inside of cabinets.
14. Label for Organization
DIY labels for the pantry not only look great, but they also help the family stay organized. Transfer snacks and cooking essentials into clear, airtight containers to keep them fresh and make it easy to find exactly what you need.
15. Upgrade an Island
Make more of an island with a solid back by adding storage bars and bins. It's the perfect spot to keep towels, cutting boards, and other items needed during dinner prep.
16. Hang Shelves
When space and budget don't allow for new cabinets, add more storage in the kitchen by installing basic shelving on a stretch of wall. Use the expanse to store dinnerware, serving pieces, or decorative items.
17. Repurpose Ordinary Items
Put a paper towel dispenser to new use by stacking cookie cutters on it. This simple solution makes it easy to carry the cutters wherever they're needed, and keeps the small items from getting lost in a drawer.
Cleaning Hacks to Make Your Life Easier...
Be a better and faster cleaner with these clever ideas and creative techniques that help take the work out of your chore list. So tuck these ideas into your bag of tricks and consider your home cleaning done.
1. Clean Cabinets - Use your vacuum's brush attachment to pick up dust and crumbs inside. Outside, concentrate on the area around the hardware using a cloth dampened with warm water and Murphy Oil Soap.
2. Use the dishwasher to clean light fixtures. Run removable glass pieces, such as domes, through the dishwasher run a drying cycle to reduce spotting.
3. Use a pillowcase to clean a ceiling fan. Slip a pillowcase over ceiling fan blades, one at a time, then wipe. Dust falls into the pillowcase, not on your furniture and floors.
4. Use old socks to clean blinds. Put an old sock on one hand and spritz it with water. Grip each panel of the blind and slide sock-covered hand from one end to the other, removing dust from both sides of the slat at once.
5. Use a paint roller to clean popcorn ceilings. Roll a damp high-nap paint roller over the ceiling to pick up dust and cobwebs without knocking down pieces of the ceiling the way sweeping would.
6. Spot-Clean fabrics with baby wipes. Baby wipes are surprisingly effective because they contain very little moisture, have gentle cleaning agents, and dry quickly. Just don't confuse them with cleaning wipes, which might contain bleach or other harmful chemicals.
7. Use tennis balls to launder comforters. You can machine-wash most comforters in front-loaders, as long as the comforter fills only half the washer. Dry with tennis balls to keep the stuffing from collecting in one corner.
8. Clean window treatments faster by not taking them down. Instead of taking them down, just shake them out to remove loose dust. Then vacuum from top to bottom using the upholstery attachment.

Why Practice Good Housekeeping?
Good housekeeping is an important safety issue. It shouldn't be a surprise if you consider that many of the potentially dangerous materials, tools, and substances you work with are lying, ready to make trouble, in the work area. Even items that aren't really hazardous can be dangerous when they're left around where people can trip over or bump into them.
Good housekeeping has other virtues. When your work area is clean and neat, it's a lot easier to find what you need and do your job efficiently. It also makes it easier to respond to or get out
fast in an emergency.
Good housekeeping is everyone's responsibility. While the maintenance department employees handle heavy cleaning and similar tasks, they don't know where all your tools and materials are kept. They haven't had the training you've had on proper handling of hazardous substances and other materials in your work area. In short, it's not their job to pick up after you.
Good housekeeping has to be constant and ongoing if it's going to prevent and eliminate hazards in your work area. Most people would never let any part of their own homes, including home workshops, get as cluttered and dirty as their work areas become. And that's not just unpleasant—it can be extremely dangerous. There are several types of hazards that you should always be on the alert for so that they can be eliminated immediately. You can readily prevent these hazards by applying to your own work area the safety rules and procedures you've learned. Let's look at the potential hazards one
by one:
• Tripping and falling hazards are anything on the floor that doesn't belong there: machines, tools, cords, air hoses, scraps, boxes. You can protect yourself and others from tripping and falling hazards by not keeping anything—even temporarily—on the floor. Every machine, tool, material, and substance belongs in some specific place. That place should never be the floor. Other things that don't belong on the floor include boxes that are waiting to be moved and cords, cables, and air hoses. Rest them on an elevated surface, out of harm's way.
• Floors should be kept clear—period.
• Impact and contact hazards—that is, objects that can hit you or that you can bump into—are common problems. Open drawers and tools left perched precariously on a table are typical examples. Contact hazards can be prevented by putting things away properly—don't just leave tools or materials on the edge of a surface where they can fall. And, don't leave drawers open where someone can bump into them. Put things where they belong.
• Puncture and splinter hazards exist when sharp-edged or pointed tools are left exposed. Splinters can develop on any surface and on a variety of materials. Puncture and splinter hazards can be prevented in a similar way. There's no excuse for leaving sharp or pointed
objects lying around where someone—like you—could be injured by them. Splinters are a little less obvious. If you risk touching a rough edge with splinters, either cover it or sand it off.
• Electrical hazards include extension cords, cords left near heat or water, overloaded circuits—anything that could cause fire or shock. Protect yourself and others from electrical hazards by knowing the basics of electrical safety. Don't overload circuits, and be sure you're using the right plug in the right outlet. Make sure wiring insulation is
intact. Don't use extension cords if you have a choice. And, never leave a cord near heat or water. Fire prevention requires you to practice electrical safety and keep an eye out for anything in the work area that could burn. But, electricity is not the only fire hazard.
• Be alert to open containers of flammable liquids, scrap or flammable liquids near ignition sources, dust or lint on machinery, and materials that block access to fire exits or equipment. If you're working with flammable liquids, make sure they're kept in approved
airtight metal containers and that they're nowhere near an ignition source. Don't let dust or lint build up on machinery or work surfaces. If they contact an ignition source, like a spark, you could have a fire on your hands.
• You accomplish another part of fire safety when you eliminate tripping and falling hazards. If there is a fire, the aisles and passageways must be clear so workers can get out and firefighters can get in. Also keep this in mind when you stack materials—don't
pile them so high they interfere with the sprinklers.
• Chemical exposure or spills are always a risk when chemical containers are in the work area, especially if they're left open. Chemical reactions can occur if the chemicals in the work area are allowed to mix with things that will cause dangerous reactions, such as other chemicals, water, or air. Watch out for combustible scrap, like oil-soaked rags. Such scrap should be disposed of in tight-sealing metal containers that are emptied daily. As you know, there are a lot of ways to protect yourself from chemical exposure. Be sure to remove only the quantities of a chemical you need and to keep the container closed when not in use. To prevent chemical spills, inspect containers regularly to make sure there are no leaks. If there is a small spill, clean it up immediately according to the procedures on the material safety data sheet (MSDS) and your company policy. If you've read the MSDS, you shouldn't have a problem understanding chemical reactions. Nevertheless, don't leave the container sitting
around. Someone less knowledgeable than you could move it near an incompatible substance—which could just be air. So, keep an eye on your chemicals, and keep only what you need in the work area.
If you train your eyes to look for these hazards, you can eliminate them before they cause trouble. As you can see, good housekeeping for safety is really a matter of applying all your safety knowledge on a small scale. Even one tool or a small chemical container can cause a big problem. This kind of housekeeping takes almost no time and effort if you do it as you go. Instead of leaving a tool in one place and then going back and putting it away properly later, put it away properly the first time. Instead of leaving materials on the floor to be taken to storage, take them now. You get the idea. The whole point of good housekeeping is that it's an ongoing part of safety, a necessary step in every job.
Here are a few more housekeeping tips to keep in mind:
• Don't let grease or dirt build up; they're not only fire hazards, but are also bad for the equipment.
• Keep food, drinks, and cigarettes out of the work area. They can be contaminated by chemicals, attract bugs, and add to the clutter.
• Keep cords, wires, and ropes untangled. Getting knotted up is bad for them and a pain in the neck to undo.
• Make sure all containers and materials are labeled. If you don't know what something is, find out.
• Dust or wipe lights occasionally. Dirty lightbulbs don't give off much light (and waste energy). They can also build up heat and may even become a fire hazard.
• Report holes, loose boards, and other flooring problems so they can be fixed before someone trips and gets hurt.
• Throw away trash promptly and properly. Be sure that hazardous trash goes in proper containers, incompatible trash in its containers, etc. Trash should also be emptied frequently.
• Don't pile up scraps of odds and ends that you think might come in handy someday. If you really can use them, choose and label a shelf or drawer and keep them there. It's not really very hard to keep your work area clean, uncluttered, and safe, and it makes for
much more pleasant and productive working conditions
.
Tips on how to speed clean your home:
1. Tote Your Tools
Keep everything you use to clean your home ready to go in one cleaning tote, caddy, or bucket. You won't waste time gathering your necessities to start or continue -- just bring it with you from room to room. If your home is large, consider creating two or more: one for each level.
2. Overlook the Little Things
That thimble collection or brass animal display needn't get a complete wipedown every single week. Save time by giving yourself the OK to skip the little stuff and instead focus on the big picture. Treating wee things to a good dusting once a month is just fine.
3. Stick to a System
Establish a cleaning pattern to consistently shave time off your cleaning routine. Experts recommend starting each room to the left of the doorway, at the top, and moving clockwise and down. Once you get the hang of your system, you'll clean speedily on autopilot -- and never waste time backtracking.
4. Conquer Clutter
Cleaning goes much more quickly if you don't have to declutter along the way. Make sure each family member has a catchall spot for personal things. Cubbies, tote bags, and small laundry baskets all work. They should be emptied regularly. Make a rule: If it's full, its owner needs to trash, donate, or find a permanent home for all contents.
5. Stash Supplies
To save time on cleaning day, clean as you go whenever possible. To that end, stash a few key cleaning supplies in each room or on each level of your home. When messes happen, it's a cinch to swoop in, swipe, and move on.
6. Squeegee the Shower
Use a squeegee on the shower walls and door after every use. This quick, immediate act saves time battling soap scum and water spots later. Bonus tip: Keep the shower door slightly open after use to promote airflow and hamper mildew buildup.
7. Focus
If you truly want to speed-clean, put the phone down. Better yet, tuck it out of sight. And keep the TV off. Focus solely on the task at hand. Multitasking while you clean adds time. Better to get your cleaning done quickly and then move on.
8. Get Help
Cleaning should not be one person's responsibility. Permanently shorten your own clean time by assigning tasks to family members. Even young kids can pick up, make the bed, and change out hand towels. Make your expectations crystal clear, and trust them!
9. Clean Your Way
Tailor your cleaning routine to fit you. Take our Cleaning Personality Quiz and discover what type of cleaner you are. We'll pair you with smart tips and tricks that suit your style.
DECLUTTER IN LESS TIME
Declutter the Bathroom
If you have 5 minutes: Put away anything on the countertops, and pull the shower curtain closed to conceal any bathtub clutter.
If you have 10 minutes: Straighten any open displays, and relocate items that don't belong in the bathroom. Don't worry about what's behind closed doors.
If you have 15 minutes: Dive into the vanity cabinet and any other storage space. Toss items that are outdated or unused. Corral items by type into baskets or bins.
Declutter the Pantry
If you have 10 minutes: Stack and store items as they are, but align rows of cans and boxes for a neatened appearance.
If you have 15 minutes: Regroup food by item type. Toss anything that is expired. Wipe away any spills or dirt on shelves.
Take an hour and... Pull everything out of the pantry and do a deep reorganization. Look at your pantry configuration and what you need to store to determine what should go where. Keep the items you use frequently in the most accessible places. Give the shelves a good scrubbing before re-placing items. As you put things away, make a list of any storage accessories (such as trays or baskets) that would make your storage more efficient, and keep your eyes peeled for those items when you are out and about.
Declutter Your Plastic Container Collection
If you have 5 minutes: Separate lids and containers into their own spots.
If you have 10 minutes: Organize lids and containers by size.
If you have 15 minutes: Pull out the lone lids or containers. Pair up lids and containers that match, and discard anything that doesn’t have a match. Place the items back in an organized fashion.
Declutter Your Bookshelves
If you have 10 minutes: Straighten books, and dust the very edges of the shelves and any items on display that look dusty.
If you have 15 minutes: Do a quick sort. Recycle magazines that are out-of-date. Pull books that you know at a glance need to be donated. Dust the shelf edges and around empty space, and move display items to dust around and under them.
Take an hour and... Pull everything from the shelves. In addition to recycling magazines and pulling books to be donated, reorganize books in alphabetical order, by subject, by color, etc. Dust the full shelves before placing books back in their rightful spots.
Declutter Your Kitchen Cabinets
If you have 5 minutes: Simply straighten the insides of your most disorganized or most frequently accessed cabinets and drawers. Bringing order to the things you use most often will make daily routines easier.
If you have 10 minutes: Spend a little time doing the organizational tasks you always think about when you're cooking but don't have time to do in the moment, such as relocating your cooking utensils to a drawer closer to your range.
Take an hour and... Do a quick sort-and-toss. Put items you never use into a donation box, and toss gadgets that no longer work or are past their prime.
Declutter Your Clothing Closet
If you have 5 minutes: Hang up clothes that are draped over your designated drop spot, such as on a chair.
If you have 10 minutes: Reorganize the hanging bar in your closet by item type, placing all of your shirts in one section, pants in another, etc.
If you have 15 minutes: After you organize the hanging bar, target one other area, such as the top shelf or the floor of your closet. Come back as you have time, such as five minutes before hitting the hay, to organize the next section until you've worked through the whole closet.
Declutter Your Entryway
If you have 5 minutes: Straighten up the shoes and coats.
If you have 10 minutes: Entryways, as coming-and-going spots, tend to collect more than their fair share of clutter. Do a quick cleanup, and return items to their rightful places.
Take an hour and... Hang hooks or pegs to give coats and bags a home that isn't the floor.
Declutter Your Kids' Rooms
If you have 10 minutes: Make a game of it. Challenge your child to pick up as many items as possible in five minutes. If you have little ones who aren’t old enough to pick up, spend a few minutes before they go to bed picking up a few things.
If you have 15 minutes: Target one area to clean up, such as a disorganized dresser, a messy desk, or a haphazard bookcase.
Take an hour and... Pick an area that needs a purge, such as a toy collection or the clothing closet. If your child is old enough, have him or her work with you to identify items that can be donated or tossed if they are broken or no longer usable.
15-Minute Decluttering: The Living Room
Pick up anything that doesn't belong in the living room and return it to the right spot. Or sort through magazines and toss outdated periodicals in the recycling.
15-Minute Decluttering: The Utensil Drawer
Focus on frequency of use. Everyday tools need barrier-free access while the rest can be tucked away. Use adjustable trays or dividers for even better organization. Each compartment should hold only one type of tool, one layer deep.
15-Minute Decluttering: Refrigerator or Freezer
Take a few minutes to assign spots using your fridge's current contents to establish specific spots for foods you typically stock. Affix moisture-resistant labels to shelves, racks, and trays, as well as containers.
15-Minute Decluttering: Under the Sink
Keep the area neat by storing only one paper towel roll and tidy up each time you replace it. Old media caddies are the perfect size for movable kits filled with cleaners and scrubbing tools. Stash one beneath your sink so you're ready for a quick clean.
The 10 Dirtiest Places In Your House (You'll Be Surprised!)
1. Faucets - As in the part where the water comes out. "Chances are, if you haven't cleaned this, you will find black, mildewy grunge," says Donna Smallin Kuper of Unclutter.com. Every couple of months, remove the faucet aerator by twisting it counter-clockwise, then soak it in vinegar for at least 15 minutes. (The aerator is actually an assembly made up of a few pieces, including a screen, so take note of how they go back together.) Gently brush all parts with a toothbrush to remove any remaining residue, then screw it back on.
2. Handles and Switches - Think refrigerator door handles, light switches, and, of course, the toilet flush handle. These are easily overlooked in cleaning because they're small, and most people focus on the big things, like floors and countertops. Use a microfiber cloth dampened with your favorite cleaning product to wipe down handles and switches during your normal cleaning routine.
3. Above Kitchen Cabinets - That no-man's land between cabinets and ceiling is a case of out of sight, out of mind. Break out the stepladder and your vacuum's hose attachment (or a wet/dry vac). A small hand broom and dustpan will do the trick, too. The space will likely not accumulate enough dust to warrant a cleaning every week, but once a month or so will do the trick. Do this task first so any stray dust lands on surfaces you have yet to clean.
4. The Bathtub - Any standing water that lingers after a shower or bath breeds mold, fungi, and staph bacteria. Your tub or shower surface should be dried off after each use to reduce bacteria growth. Disinfect regularly, too -- up to three times weekly for tubs used daily by multiple family members. To do so, Harmon recommends filling a spray bottle with a product that contains at least 3 percent hydrogen peroxide, and keeping that near the tub. Lightly mist a dry tub, and you're done. "No need to wipe it up because hydrogen peroxide evaporates quickly," Harmon says. For whirlpool tubs, cycle disinfectant through the pipes monthly according to manufacturer's directions.
5. Inside the Refrigerator - Sticky takeout containers and long-forgotten leftovers mingle in an awkward space accessed by multiple hands daily. This means refrigerators are destined not only to be dirty, but to land last on the must-clean list. Ditto for microwaves. Avoid using chemical cleaners here. Instead, fill your sink with hot water and dishwashing liquid. Remove items from one refrigerator shelf, then remove the shelf itself. Wash it in the sink, wipe it dry with a microfiber cloth, then re-place in the fridge. Repeat for the remaining shelves.
6. Kitchen Sink - Thanks to all those food particles mingling in a moist environment, the kitchen sink is actually dirtier than your toilet post-flush, according to Charles P. Gerba, a University of Arizona professor and microbiologist known as Dr. Germ. Wash the sink with soap and water daily, and disinfect it with kitchen cleaner once or twice a week.
7. The Walls Around Your Toilet - The best cleaners for the walls around the toilets contain enzymes to break down the organic material, Christian says. Spray the walls and let sit for at least a few minutes so the enzymes can do their work. Then wipe down with a damp towel.
8. Remote Controls - Hands in all states of cleanliness handle it often. Yet it's rarely wiped clean, even after a sick day spent channel-flipping. "The TV remote is one of the germiest surfaces in your home," says Harmon of Healthy Clean. Use a disinfectant wipe to clean remotes often. To get in between the buttons, try a cotton swab dipped in rubbing alcohol.
9. Under, Alongside, and Behind Your Stove - You'll have to pull the stove away from the wall. Make this easier and protect your flooring with furniture sliders under the feet of the stove. (A bath mat with the carpet side down works, too.) If you have a gas stove with a flexible hose, pull until the hose is almost -- but not fully -- extended. (If your gas stove does not have a flexible hose, you'll need a pro's help.) Once the stove is pulled out, scrape off buildup with a plastic putty knife, then spray the sides of the oven with oven cleaner. Use a good all-purpose cleaner on the adjacent cabinets and floor.
10. Inside Your Toothbrush Cup - Not only are they hard to clean, they're usually positioned next to the toilet, which sprays small amounts of fecal debris when flushed. This offender is a simple fix: Keep toothbrushes in a moveable, easy-to-clean cup.
Clean it: Soak the cup in warm water mixed with a little bleach for a half hour. Rinse, then soak in clean water for another 30 minutes to remove the bleach residue. Better yet, use a cup you can toss in the dishwasher instead.
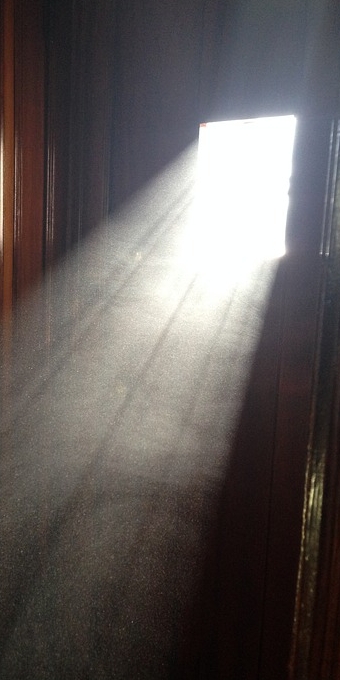
Dust-free home
It is very important to keep a clean, dust-free home. Dust can cause many medical conditions such as allergies and even asthma, and it can also trigger chronic diseases.
Dusting your home should be a very thorough job if you dont want the dust to be back after a day or two. Simply dusting the visible surfaces usually doesnt help much. Dust itself accumulates mostly in fiber, especially carpets. Having said that, it is very important to vacuum your room carpets regularly, that is at least twice a week, or even more if you have the time for it.
Another thing that accumulates a lot of dust are books. If you have a considerably big library in your home make sure to clean the book surfaces as frequently as possible, it can be annoying and a lot of work, but its important if you want to keep a clean house/apartment.
Dont forget the ceilings, lights and chandeliers, they may be high to reach so just use a dust mop to clean them up since a lot of dust can accumulate on them.
At last, be careful with the kind of dusting tool you choose to do your cleaning with, since some materials can damage the furniture and wood. I personally recommend microfiber cloth, since they dont release any dust into the air and will not damage your furniture.
Cleaning secrets
1...Potatoes will take food stains off your fingers. Just slice and rub raw potato on the stains and rinse with water.
2...Use air-freshener to clean mirrors: It does a good job and better still, leaves a lovely smell to the shine.
3...To remove a stain from the bottom of a glass vase or cruet, fill with water and drop in two Alka-Seltzer tablets. (The citric acid and effervescent action cleans vitreous china, and vases)
4...To polish jewelry, drop two Alka-Seltzer tablets into a glass of water and immerse the jewelry for two minutes.
5...To clean a thermos bottle - fill the bottle with water, drop in four Alka-Seltzer tablets, and let soak for an hour (or longer, if necessary).
6...To unclog a drain - clear the sink drain by dropping three Alka-Seltzer tablets down the drain followed by a cup of Heinz White Vinegar. Wait a few minutes, then run the hot water.
CLEANING AND KIDS
--------------------
1...While straightening up, give your kids a large basket and ask them to go from room to room collecting anything they see that is out of place. When they are finished, send them to drop the things off in the room they belong in.
WALLS AND FLOORS
--------------------
1...For stubborn stains on kitchen linoleum floors, soak a cotton ball with alcohol, wipe cotton ball over stain. No more stain.
2...Rubbing alcohol takes fingernail polish out of any carpet. Just pour a dab on stain and rub gently with a rag. The stain will disappear and the carpet will be fine.
3...To remove stickers from glass or hard surfaces, just use rubbing alcohol and a cloth.
4...Using baking powder and a dry rag will remove crayon on walls. It is like a crayon eraser.
5...Baking soda is great for removing crayon marks on painted surfaces--and even on plastic surfaces. Just sprinkle a small amount on a damp sponge or wash cloth and wipe the area.
6...Children use crayons on painted walls??? - Use toothpaste to clean it. Put a little toothpaste on a soft toothbrush, wet and lightly scrub. Wipe down the wall with a damp rag'
7...To remove permanent marker from surfaces, apply breath spray on the marker, wait a few seconds, and wipe it away.
8...To remove fruit juice stains, pour boiling water over the stain until it disappears. This will not set the stain - It will remove it.

MONEY SAVERS
--------------------
1...Make your own baby wipes: Cut a roll of paper towels in half. Remove the inside cardboard and place the rolled towels in a 10-cup, cylindrical Rubbermaid container. In a separate bowl, mix 2-3 cups of water with one tablespoon liquid baby bath and one tablespoon baby oil. Pour the mixture over the half roll of paper towels, then pull up a wipe from the center of the roll to get them started. If there's too much liquid, simply pour off the excess.
Leave out the baby oil and you can use the wipes for cleaning surfaces around the house, especially in the bathroom! You can also change the ingredients for other uses, such as adding Pine-Sol for a quick floor or toilet wipe.
2...
Alternative Cleaning Solutions:
***To cut the grime from glass, use club soda and wipe with a crumpled newspaper.
***Baking soda is a wonderful scrubbing cleaner.
***Clean drains periodically with baking soda and distilled vinegar and rinse with very hot water. This recipe also helps some clogged drains and toilets.
***To cut the grime from glass, use club soda and wipe with a crumpled newspaper.
***Baking soda is a wonderful scrubbing cleaner.
***Clean drains periodically with baking soda and distilled vinegar and rinse with very hot water. This recipe also helps some clogged drains and toilets.
Best cleaning shortcuts:
Map a Cleaning Route
For a one-story house or an apartment, start with a corner room and work inward. If you have a two-story house, start with a room at the top corner of your home and work your way in and down. Clean each room completely before moving on to save energy and time wasted from walking back and forth.
Break Up Chores
Instead of spending an entire day or weekend cleaning, clean half the house, or one story of a two-story, on one day or afternoon. Clean the other half or other story on another afternoon. Reserve a block of time for the attic, basement, or garage.
In the Kitchen
Keep your kitchen in order by creating a place for everything. Store cookware and utensils near the range or cooktop so they are within reach when cooking. Keep a spray bottle with a solution of one part bleach to four parts water or an all-purpose spray cleaner in the kitchen for cleaning after meals.
In the Bathroom
Stash a spray bottle with all-in-one window and surface cleaner and an extra roll of paper towels under each sink for surface cleanups.
In the Hall Closet
Install storage bins with separate drawers for gloves, hats, and scarves. Stock up on stackable see-through plastic containers to store lightbulbs, batteries, and emergency candles.
Laundry Room
Keep all laundry supplies together in a pretty basket or box. This will save time when doing loads of laundry and will keep the laundry area tidy.
Create a Cleaning Center
To make your cleaning center efficient, use baskets, bins, and caddies to store products and supplies. Consider integrating your cleaning center into an existing laundry area or room. Create customized cleaning and supply checklists. Post daily, weekly, and monthly chores on a small bulletin board in the cleaning center. When a product is running low, note it on the list before the next shopping trip.
Cleaning Central
Store all cleaning supplies in one place for easy retrieval. A closet or laundry room is ideal for supply storage. Wherever you choose to store cleaning supplies, keep them out of the reach of small children.
Use a Basket
Train all family members to put dirty clothing in hampers. Place a basket or hamper in each bedroom closet, and in each bath if space allows. Place three additional hampers in the laundry area -- for dark clothes, light clothes, and towels. In households with teens, delegate a laundry responsibility to each family member. Assign simple laundry chores, such as folding socks, to younger children.
DECLUTTER THE KITCHEN:
Ditch Extra Dishes
They might be pretty, but unless you use them regularly, a second (or third) set of dishes can be a big source of kitchen clutter. Instead, figure out what you really use, keep enough for when you host gatherings, and donate the rest. Also, declutter regularly by getting rid of chipped or broken pieces.
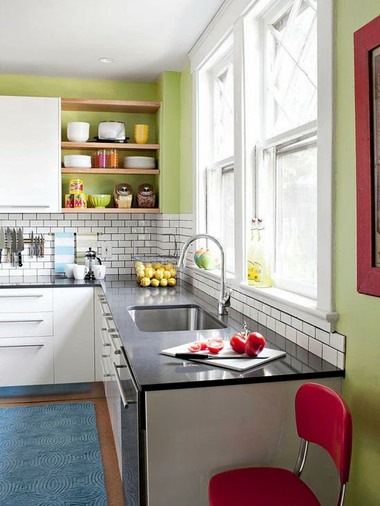
Make Room for Narrow Storage
Nooks and crannies are kitchen-decluttering assets: They're perfect for a single depth of containers or dishware, which makes it less of a chore to find and organize items. Look for spots where you can easily carve out 6 or so inches -- by a mudroom door, for example. To give the space a design boost, paint the back wall a complementary color, and skip doors in favor of well-chosen items and pretty containers.
Clear Off Countertops
Lots of stuff on your kitchen countertops equals lots of kitchen clutter. Make it a habit to clear and organize those surfaces at least once a day. Stash unnecessary pieces in cabinets, and corral loose bits and pieces in pretty bowls or trays.
Declutter One Drawer at a Time
The old saying that Rome wasn't built in a day certainly applies to kitchen decluttering: You don't have to tackle the whole room at once. One drawer, one cabinet, one shelf can make a big difference. A good place to start is the junk drawer: It's a source of daily necessities and never-ending frustration. To declutter it once and for all, outfit the space with a variety of clear organizing bins, and add a label to the bottom of each so household members know what goes where.
Create a Communications Center
Lots of the clutter that accumulates in a kitchen happens because of daily life: keys, schedules, paperwork, and more typically land somewhere inside the home's most-used door, which is often in the kitchen. To store and organize those items, create a family communications center. It may be as simple as a reminder of what's for dinner this week, or as complex as a weekly schedule with key rings, smartphone plugs, and more. Keep it in a central spot so decluttering the kitchen becomes part of the daily routine.
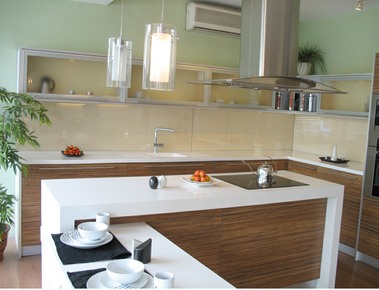
Hang Pots and Pans
Many big cooking pieces, such as pots and pans, aren't used with daily frequency. But still, they're good to have when the need arises. A good storage solution that can help declutter a drawer is to install a hanging rod -- here, a simple length of pipe. If you don't have room to suspend it over an island or sink, consider a near-the-ceiling spot in an open kitchen eating space -- here, in a seating nook adjacent to the kitchen.
Evaluate Your Appliances
Be honest: When's the last time you used that fancy mixer, or food processor, or juicer? Those pieces can quickly gobble precious counter and cabinet space, even as they gather dust. It's time to declutter: If you haven't used an appliance in a year, find it a new home. If you use it several times a year, find a spot other than the countertop to store it.
Toss Container Odds and Ends
A cracked lid, a chipped container: The wear and tear on kitchen storage equals lots of unmatched pieces. At least twice a year, pull them all out of your cabinets, pairing lids with containers and throwing away anything that doesn't have a match or has seen better days. Replace, if necessary, with clear containers that have useable lids (think flip, snap, and pourable).
Clear Out Under the Sink
A few clever, practical storage pieces can help you declutter your under-sink spot in the kitchen. Remove everything first, and add an elevated shelf to take advantage of the space's height. Put cleaning-solution bottles in a caddy (to better cart them from room to room) or on a lazy Susan. Hooks and additional trays keep other cleaning necessities in easy view.
Tackle the Fridge
Think about how many times you open the fridge on a daily basis. Now name the last time you decluttered this valuable appliance. Probably rarely, right? And yet a fridge can be a huge source of kitchen clutter, with expired food, old bottles, and more gobbling up valuable inches. Try to declutter yours once a month: Take everything out, give inside surfaces a wipe-down, and toss that bottle you've never opened, the forgotten leftovers, or the past-its-date products.
Toss Anything Old or Broken
Dingy kitchen towels, a pan with a broken handle, a cracked cutting board: Sentiment or habit might have prevented you from tossing or replacing these pieces, but anything old or broken simply adds to your kitchen's clutter problems. Take an hour or two to review your cabinets and drawers, and get rid of anything that is in disrepair or has outlived its usefulness.
They might be pretty, but unless you use them regularly, a second (or third) set of dishes can be a big source of kitchen clutter. Instead, figure out what you really use, keep enough for when you host gatherings, and donate the rest. Also, declutter regularly by getting rid of chipped or broken pieces.
Make Room for Narrow Storage
Nooks and crannies are kitchen-decluttering assets: They're perfect for a single depth of containers or dishware, which makes it less of a chore to find and organize items. Look for spots where you can easily carve out 6 or so inches -- by a mudroom door, for example. To give the space a design boost, paint the back wall a complementary color, and skip doors in favor of well-chosen items and pretty containers.
Clear Off Countertops
Lots of stuff on your kitchen countertops equals lots of kitchen clutter. Make it a habit to clear and organize those surfaces at least once a day. Stash unnecessary pieces in cabinets, and corral loose bits and pieces in pretty bowls or trays.
Declutter One Drawer at a Time
The old saying that Rome wasn't built in a day certainly applies to kitchen decluttering: You don't have to tackle the whole room at once. One drawer, one cabinet, one shelf can make a big difference. A good place to start is the junk drawer: It's a source of daily necessities and never-ending frustration. To declutter it once and for all, outfit the space with a variety of clear organizing bins, and add a label to the bottom of each so household members know what goes where.
Create a Communications Center
Lots of the clutter that accumulates in a kitchen happens because of daily life: keys, schedules, paperwork, and more typically land somewhere inside the home's most-used door, which is often in the kitchen. To store and organize those items, create a family communications center. It may be as simple as a reminder of what's for dinner this week, or as complex as a weekly schedule with key rings, smartphone plugs, and more. Keep it in a central spot so decluttering the kitchen becomes part of the daily routine.
Hang Pots and Pans
Many big cooking pieces, such as pots and pans, aren't used with daily frequency. But still, they're good to have when the need arises. A good storage solution that can help declutter a drawer is to install a hanging rod -- here, a simple length of pipe. If you don't have room to suspend it over an island or sink, consider a near-the-ceiling spot in an open kitchen eating space -- here, in a seating nook adjacent to the kitchen.
Evaluate Your Appliances
Be honest: When's the last time you used that fancy mixer, or food processor, or juicer? Those pieces can quickly gobble precious counter and cabinet space, even as they gather dust. It's time to declutter: If you haven't used an appliance in a year, find it a new home. If you use it several times a year, find a spot other than the countertop to store it.
Toss Container Odds and Ends
A cracked lid, a chipped container: The wear and tear on kitchen storage equals lots of unmatched pieces. At least twice a year, pull them all out of your cabinets, pairing lids with containers and throwing away anything that doesn't have a match or has seen better days. Replace, if necessary, with clear containers that have useable lids (think flip, snap, and pourable).
Clear Out Under the Sink
A few clever, practical storage pieces can help you declutter your under-sink spot in the kitchen. Remove everything first, and add an elevated shelf to take advantage of the space's height. Put cleaning-solution bottles in a caddy (to better cart them from room to room) or on a lazy Susan. Hooks and additional trays keep other cleaning necessities in easy view.
Tackle the Fridge
Think about how many times you open the fridge on a daily basis. Now name the last time you decluttered this valuable appliance. Probably rarely, right? And yet a fridge can be a huge source of kitchen clutter, with expired food, old bottles, and more gobbling up valuable inches. Try to declutter yours once a month: Take everything out, give inside surfaces a wipe-down, and toss that bottle you've never opened, the forgotten leftovers, or the past-its-date products.
Toss Anything Old or Broken
Dingy kitchen towels, a pan with a broken handle, a cracked cutting board: Sentiment or habit might have prevented you from tossing or replacing these pieces, but anything old or broken simply adds to your kitchen's clutter problems. Take an hour or two to review your cabinets and drawers, and get rid of anything that is in disrepair or has outlived its usefulness.
SPRING CLEANING TIPS....
15 Places You Didn’t Know Have Lots of Germs:
1. Knife Blocks - often, surprisingly, riddled with bacteria. People clean their knives and then put them back into the knife block for storage. While your knives maybe clean after you have washed, them, when they are put back into the knife block, they will be contaminated. Knife blocks feature small crevices, in which dampness can build up. Knife blocks feature small spaces, which are very difficult to clean, which also promotes the build-up of bacteria.
2. Money is one of the most germ-ridden objects that you come into contact with on an everyday basis. Research conducted by New York University found that money contains hundreds of different types of germs. In fact, money contains over 3,000 different types of bacteria. As money is transferred from person to person, each person touches this money with, often, bacteria laden hands.
3. Oven/Hob dials - Dials on your oven, hob and other kitchen appliances contain high amounts of germs. In the kitchen, these items are frequently touched when you have greasy or dirty hands or just after you have handled something like raw meat. Many people simply forget to clean areas like the dials on their oven, so bacteria build up.
4. Kitchen sinks - Surprisingly, the kitchen sink is one of the most germ infested places in your home. As people tend to put plates and other dirty dishes in the sink to soak before putting them into the dishwasher, or washing them, the food particles on these dishes can cause bacteria to build up. Bacteria, from salmonella to E. coli can build up in your sink. Essentially, your kitchen sink can be the perfect breeding ground, for all types of germs.
5. Kitchen faucet - The kitchen faucet is one of those places that people expect to be clean, but really, it can build up a great deal of bacteria. The screen at the end of the faucet is moist, making it the perfect environment for bacteria to grow. If you touch the faucet or get food on it, then the bacteria from this can build up.
6. Toothbrush - Your toothbrush is an item you use every day, but it can actually be home to a wide range of bacteria. As it is a moist item, it is the perfect place for germs to breed. It’s not only the germs from your mouth that can build up on your toothbrush either. When you flush the toilet, bacteria-riddled water droplets spray out from the toilet, and land on surrounding items. As most people keep their toothbrushes in the bathroom, these water droplets can land on your toothbrush.
7. TV Remote - The remote control for your TV is one of the dirtiest items in your home. Everyone in your household touches it, which transfers bacteria onto it. Also, your television remote is often put in dirty places, like the floor or between the sofa cushions. Researchers from the University of Virginia found that more than 50% of remote controls tested positive for cold viruses.
8. Keyboard - Your keyboard contains a whole host of germs. In a study conducted, researchers found E. coli and staph on the keyboards that they tested. In fact, your keyboard contains five times more germs than your toilet seat does.
9. Bathtub - While you may take a bath to clean yourself, studies have found that your bathtub actually contains high levels of germs. Studies have found harmful bacteria like staph in bathtubs.
10. Vacuum cleaner - People use vacuum cleaners to remove dust and dirt from their homes, in an attempt to make their home cleaner. However, vacuum cleaners actually carry and spread many germs. A study conducted by the University of Arizona found that 13% of vacuum cleaner brushes contain E. coli, which you can spread around your home. Vacuums contain germs because of all the food, debris and other bacteria that are sucked up into them during the vacuuming process.
11. Household sponges - are the most germ-ridden items that people have in their household. A study found that a kitchen sponge, on average, is home to more than 10 million bacteria per square inch. This is an incredibly high amount of bacteria. In fact, your household sponge is 200,000 times dirtier than your toilet seat.
12. Can opener - As people don’t tend to wash their can opener as often as their other kitchen utensils, bacteria can build up on them. When you use your can opener, food contaminates it. If you put the can opener back without washing it, this food will rot, and the can opener will contaminate other items in the drawer.
13. Coffee maker - could contain harmful bacteria. Even if you keep the pot clean, the water reservoir still contains bacteria. In a study, 50% of coffee makers contain yeast and mold.
14. Toothbrush holder is the perfect breeding ground for bacteria, making it one of the most germ-ridden items in your home. Bacteria infested water from your toothbrush can drip down off your toothbrush into the toothbrush holder, where it collects. Toothbrush holders often contain coliform bacteria and staph.
15. Dish towel - 7% of dish towels contain MRSA, E. coli and many other types of bacteria. This is because dish towels are used in the kitchen, where they are often contaminated.
How to clean washing machine.
All you need is white vinegar and baking soda.
Add 3-4 cups of white vinegar to the water and allow the machine to agitate for a minute to incorporate the vinegar.
Add about ½ cup of bicarbonate . Allow the machine to run again to mix in the baking soda. Stop the washer at this point and allow the water to sit for 30 minutes to 1 hour.
This will help remove string odors, stains and detergent build up that you may have.
WOODEN CHOPPING BOARD CLEANING
Wooden Chopping board are notorious for being difficult to clean, given the fact that they have a porous surface that creates the perfect environment for bacteria to thrive. However , here is a great and simple way to clean it. All you need is half lemon, a generous punch of salt, several drops of water and a sponge that can be used to rub all the foo particles of it. It is perfect to disinfect.
Before you clean the bathroom, we recommend vacuuming it first. Hair, dust and other particles can be tough to clean up after they are wet from splashing water around in the bathroom.
Making your bed in the morning gives you clarity, focus and makes your room look clean!
Cleaning a wood table? Grab a bowl/bucket and fill it with 4 cups of water. Add ¼ cup of white vinegar. Submerge a rag in the solution and wring it out until the rag is damp, not soaked. Fold the rag and wipe the entire table, switching sides of the rag so you are always using a clean side. Once you are finished, use a microfiber cloth and spray it with lemon oil. Use all sides of the cloth to evenly wipe the entire wood table. Make sure the oil is spread evenly. You may need to use a dry microfiber cloth to buff the table and remove any excess oil.
Do you get on your hands and knees to clean the floors? Not us! We use the rubber mop. However, it helps to clean the floors around the toilet on your hands and knees. That way, when you mop the floor, you don’t have to worry about missing the corners around the toilet with the rubber mop.
We recommend using lint free surgical rags. These are the best for cleaning mirrors, countertops, floors and plenty of other types of surfaces. Eliminate the waste from using paper towels and reuse rags.
Clean your mirror with vinegar. Buff it with a lint-free clean dry rag. This method works well for windows too.
Try throwing used lemons in the garbage disposal for a fresh smell.
It is of great importance to purchase the right vacuum that satisfies your cleaning needs. Vacuum cleaners come in different sizes and shapes and this can sometimes cause us more confusion when trying to purchase the right vacuum cleaner. We have used the Henry for years and we love its versatility and ease of use.
Vinegar can clean almost every surface in the home from carpets to counter tops.
A clean and fresh bathroom doesn’t require cleaning with the expensive chemicals from the shop, No! With just a few inexpensive, effective and natural harmless items, one can easily enjoy a clean and fresh bathroom.
Clean the front of the cabinets – cooking grease mostly builds up on the fronts of the counters and later mixes with dust making it more stained. Apply generous amount of undiluted vinegar on the grease build up, let it sit for 5-10 minutes, then wipe clean with a cloth or a microfiber scrubber. Repeat if badly stained, until you get clear results.
It is vital to develop a weekly thorough cleaning schedule to avoid build-ups that cost us long days of cleaning.
Cut the lemon in half and squeeze out the juice without the seeds into a microwaveable dish and mix with the water.
c. Place the solution in the microwave and turn the power on for 5-10 minutes maximum.
d. Allow the steam to condense on the walls and roof of the oven for a few minutes.
e. Using a soft cloth wipe the microwave out. The fresh lemon scent freshens both your microwave and your kitchen.
Pour one cup of white distilled vinegar into the bottom of your dishwasher.
c. Set your dishwasher on the highest heat level possible and run a full cycle. Temperatures above 140 degrees will disinfect everything and leave your dishwasher sparkling clean, with no odors.
Relax and have fun as you slowly turn your home into a haven of peace and tranquility both from within and without. Focus on changing one room at a time for an entire eco-friendly home.
Soak your new pair of jeans for 10-15 minutes in a solution of half vinegar and half water and wash as usual. This will keep your pair of jeans from fading.
How to Clean Your Microwave Floor and Turntable
To remove cooked-on spills from the floor or turntable of a microwave, make a paste of 2 parts baking soda to 1 part water and apply it to the hardened goop. After 5-6 minutes, wipe up the baking soda with a wet sponge or cloth and remove any residue with a paper towel.
Floor Surfaces Dust mop interior floors frequently using a clean non-treated dry dust mop. Sand, dirt and grit do the most damage to natural stone surfaces due to their abrasiveness. Mats or area rugs inside and outside an entrance will help to minimize the sand, dirt and grit that can scratch a stone floor. Be sure that the underside of the mat or rug is a non-slip surface. Do not use vacuum cleaners that are worn, the metal or plastic attachments may scratch the surface.
Use a old toothbrush for hard to reach areas around the soap holder, taps and drain.
Never use oven cleaner in a self-cleaning oven, as the product will clog the pores in the coating and may damage the coating.
Spray oven racks in a plastic garbage bag for easier cleaning.
Never clean a warm or hot light bulb with a damp cloth, as the bulb will shatter
To soften splatters inside the microwave, fill a cup with water and microwave on high for about two minutes. The steam will loosen any baked on food so it can be wiped cleaned.
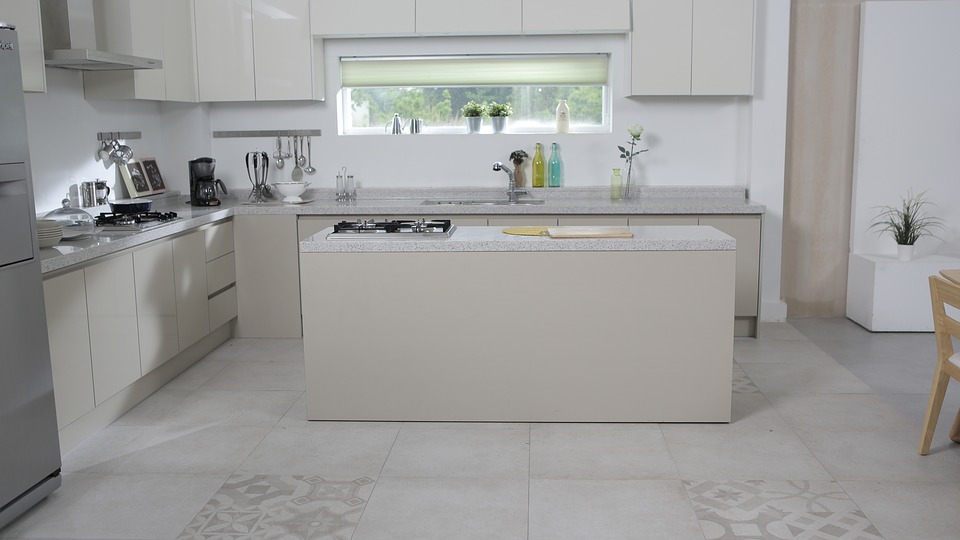
Dampen a clean, soft paintbrush to remove dust from doors,, telephone keys, carved furniture ect .
A clean, damp cloth or rubber glove will remove pet hair from furniture upholstery.
To remove finger prints from stainless steel appliances, add a small amount of baby oil to a clean. Soft cloth and wipe the surface in the direction of the grain.
Always clean from top to bottom and left to right in whatever room you are cleaning. This is the quickest and most efficient way to clean.
All you need is white vinegar and baking soda.
Add 3-4 cups of white vinegar to the water and allow the machine to agitate for a minute to incorporate the vinegar.
Add about ½ cup of bicarbonate . Allow the machine to run again to mix in the baking soda. Stop the washer at this point and allow the water to sit for 30 minutes to 1 hour.
This will help remove string odors, stains and detergent build up that you may have.
WOODEN CHOPPING BOARD CLEANING
Wooden Chopping board are notorious for being difficult to clean, given the fact that they have a porous surface that creates the perfect environment for bacteria to thrive. However , here is a great and simple way to clean it. All you need is half lemon, a generous punch of salt, several drops of water and a sponge that can be used to rub all the foo particles of it. It is perfect to disinfect.
Before you clean the bathroom, we recommend vacuuming it first. Hair, dust and other particles can be tough to clean up after they are wet from splashing water around in the bathroom.
Making your bed in the morning gives you clarity, focus and makes your room look clean!
Cleaning a wood table? Grab a bowl/bucket and fill it with 4 cups of water. Add ¼ cup of white vinegar. Submerge a rag in the solution and wring it out until the rag is damp, not soaked. Fold the rag and wipe the entire table, switching sides of the rag so you are always using a clean side. Once you are finished, use a microfiber cloth and spray it with lemon oil. Use all sides of the cloth to evenly wipe the entire wood table. Make sure the oil is spread evenly. You may need to use a dry microfiber cloth to buff the table and remove any excess oil.
Do you get on your hands and knees to clean the floors? Not us! We use the rubber mop. However, it helps to clean the floors around the toilet on your hands and knees. That way, when you mop the floor, you don’t have to worry about missing the corners around the toilet with the rubber mop.
We recommend using lint free surgical rags. These are the best for cleaning mirrors, countertops, floors and plenty of other types of surfaces. Eliminate the waste from using paper towels and reuse rags.
Clean your mirror with vinegar. Buff it with a lint-free clean dry rag. This method works well for windows too.
Try throwing used lemons in the garbage disposal for a fresh smell.
It is of great importance to purchase the right vacuum that satisfies your cleaning needs. Vacuum cleaners come in different sizes and shapes and this can sometimes cause us more confusion when trying to purchase the right vacuum cleaner. We have used the Henry for years and we love its versatility and ease of use.
Vinegar can clean almost every surface in the home from carpets to counter tops.
A clean and fresh bathroom doesn’t require cleaning with the expensive chemicals from the shop, No! With just a few inexpensive, effective and natural harmless items, one can easily enjoy a clean and fresh bathroom.
Clean the front of the cabinets – cooking grease mostly builds up on the fronts of the counters and later mixes with dust making it more stained. Apply generous amount of undiluted vinegar on the grease build up, let it sit for 5-10 minutes, then wipe clean with a cloth or a microfiber scrubber. Repeat if badly stained, until you get clear results.
It is vital to develop a weekly thorough cleaning schedule to avoid build-ups that cost us long days of cleaning.
Cut the lemon in half and squeeze out the juice without the seeds into a microwaveable dish and mix with the water.
c. Place the solution in the microwave and turn the power on for 5-10 minutes maximum.
d. Allow the steam to condense on the walls and roof of the oven for a few minutes.
e. Using a soft cloth wipe the microwave out. The fresh lemon scent freshens both your microwave and your kitchen.
Pour one cup of white distilled vinegar into the bottom of your dishwasher.
c. Set your dishwasher on the highest heat level possible and run a full cycle. Temperatures above 140 degrees will disinfect everything and leave your dishwasher sparkling clean, with no odors.
Relax and have fun as you slowly turn your home into a haven of peace and tranquility both from within and without. Focus on changing one room at a time for an entire eco-friendly home.
Soak your new pair of jeans for 10-15 minutes in a solution of half vinegar and half water and wash as usual. This will keep your pair of jeans from fading.
How to Clean Your Microwave Floor and Turntable
To remove cooked-on spills from the floor or turntable of a microwave, make a paste of 2 parts baking soda to 1 part water and apply it to the hardened goop. After 5-6 minutes, wipe up the baking soda with a wet sponge or cloth and remove any residue with a paper towel.
Floor Surfaces Dust mop interior floors frequently using a clean non-treated dry dust mop. Sand, dirt and grit do the most damage to natural stone surfaces due to their abrasiveness. Mats or area rugs inside and outside an entrance will help to minimize the sand, dirt and grit that can scratch a stone floor. Be sure that the underside of the mat or rug is a non-slip surface. Do not use vacuum cleaners that are worn, the metal or plastic attachments may scratch the surface.
Use a old toothbrush for hard to reach areas around the soap holder, taps and drain.
Never use oven cleaner in a self-cleaning oven, as the product will clog the pores in the coating and may damage the coating.
Spray oven racks in a plastic garbage bag for easier cleaning.
Never clean a warm or hot light bulb with a damp cloth, as the bulb will shatter
To soften splatters inside the microwave, fill a cup with water and microwave on high for about two minutes. The steam will loosen any baked on food so it can be wiped cleaned.
Dampen a clean, soft paintbrush to remove dust from doors,, telephone keys, carved furniture ect .
A clean, damp cloth or rubber glove will remove pet hair from furniture upholstery.
To remove finger prints from stainless steel appliances, add a small amount of baby oil to a clean. Soft cloth and wipe the surface in the direction of the grain.
Always clean from top to bottom and left to right in whatever room you are cleaning. This is the quickest and most efficient way to clean.
Making easy eco-friendly cleaning products at your home will save you hundreds of dollars each year and allow you to eliminate toxins from commercial cleaners keeping your family away from harmful health risks.
Work one room at a time. Grab a microfiber cloth dampened with vinegar for glass, a microfiber cloth dampened with natural oil for wood furniture and a microfiber cloth dampened with diluted natural dish soap to clean leather couches, electronics, switches, baseboards and other surfaces.
Start With Dusting - Look up! There may be cobwebs in the corners or ceiling. Use an extended duster to reach. Work your way down, dusting all of the particles from the top down.

Start with your closets: Pull out anything that you no longer use both old and unused. Those that are still in good condition keep them aside to either donate to charity or sell at garage sales. For the old worn out stuff that cannot be fixed or reused, throw it away.
De-clutter your life. We all fall into this habit of just storing things that are either too old or unused. De-cluttering our lives allows us to think clearly and create more space in our homes.
The rewards are unbelievable, for you, your loved ones and your environment.
Is it time to do some cleaning? You realize it could take some hard work. You may not know where to start. Put on some music to pump you up, because you are going to get a full body workout.
Did you know? We now hand-make almost 100% of our cleaning solutions so that we can ensure we are using only green products?
Toss Detergent Cap in the Wash So It Never Gets Messy
This tip is probably the simplest. Detergent caps are strong enough to survive the wash cycle so rather than dealing with the gooey mess that builds up over time, just throw it in with the clothes and it always stays clean. I usually save the cap from a detergent jug to use for the laundry so I can replace the cap on the detergent in case it gets bumped over.
Fun Tip For Washing A Large Water Container:
a. Add water to fill the bottom of the container. Add a drop of dish soap. Add ¼ cup of rice.
b. Shake it up! The rice and dish soap will clean the buildup on the inside of the bottle.
c. Rinse it out until there are no more bubbles.
The feeling of a clean kitchen is priceless, it motivates many to prepare hearty meals. Go ahead and enjoy your sparkling clean kitchen while preparing your family’s favorite meal.
We recommend an all rubber broom. This way you can put rags in the bucket of solution mixed water, twist the rags so they are damp, and put it over the rubber broom to mop the floor.
Bicarbonate of soda as it’s commonly known is made from sodium carbonate or soda ash. It’s commonly used for cooking,medicinal purposes and cleaning. Just like vinegar, baking soda is multi-purpose and less costly, its cost is far less than any other specialized cleaning agent especially when purchased in bulk.
Lemons
The acid in lemon juice removes dirt and rust stains. It’s especially effective when mixed with salt, which makes “an excellent scouring paste,” says Karyn Siegel-Maier, author of The Naturally Clean Home.
Tip :Plastic food-storage containers: To bleach stains from tomato soup and other acidic foods on dishwasher-safe items, rub lemon juice on the spots, let dry in a sunny place, then wash as usual.
Cleaning windows tips:
1. Remove any built up dust
Start by tying back or removing any curtains or blinds and use a dust pan brush or broom handle to brush around the window corners and window sill to eliminate any laying dust.
2. Start by washing your window with a sponge
Washing up liquid in warm soapy water will work well but remember – the fewer suds the better. Be careful when using strong window cleaning solutions that they do not damage surrounding paintwork.
3. Wipe off the excess water
With a clean squeegee, starting at the top of the window and work your way down in a reverse-S pattern for maximum efficiency. Regularly wipe the squeegee blade clean with an old rag to avoid transferring the dirt around.
4. Remove any remaining water
Use damp, wrung-dry chamois or microfiber cloth to remove any remaining water from the glass. Finally dry the windowsill beneath where any water may have dripped down.
5. Wash windows on a cloudy day
Although direct sunlight makes it easier to see the dirt, it also dries the windows too quickly, leaving streaks on the glass. Make sure you pick a cloudy day for your cleaning session (but if you’re doing the outside, beware of rain!).
6. Clean your windows at least twice a year
This will make a truly surprising difference to your whole room by making it lighter and brighter. You’ll be surprised at how dirty your windows can get.

How to Clean Your Microwave Floor and Turntable
To remove cooked-on spills from the floor or turntable of a microwave, make a paste of 2 parts baking soda to 1 part water and apply it to the hardened goop. After 5-6 minutes, wipe up the baking soda with a wet sponge or cloth and remove any residue with a paper towel.
Floor Surfaces Dust mop interior floors frequently using a clean non-treated dry dust mop. Sand, dirt and grit do the most damage to natural stone surfaces due to their abrasiveness. Mats or area rugs inside and outside an entrance will help to minimize the sand, dirt and grit that can scratch a stone floor. Be sure that the underside of the mat or rug is a non-slip surface. Do not use vacuum cleaners that are worn, the metal or plastic attachments may scratch the surface.
Use a old toothbrush for hard to reach areas around the soap holder, taps and drain.
Never use oven cleaner in a self-cleaning oven, as the product will clog the pores in the coating and may damage the coating.
Spray oven racks in a plastic garbage bag for easier cleaning.
Never clean a warm or hot light bulb with a damp cloth, as the bulb will shatter
To soften splatters inside the microwave, fill a cup with water and microwave on high for about two minutes. The steam will loosen any baked on food so it can be wiped cleaned.
Dampen a clean, soft paintbrush to remove dust from doors,, telephone keys, carved furniture ect .
A clean, damp cloth or rubber glove will remove pet hair from furniture upholstery.
To remove finger prints from stainless steel appliances, add a small amount of baby oil to a clean. Soft cloth and wipe the surface in the direction of the grain.
Always clean from top to bottom and left to right in whatever room you are cleaning. This is the quickest and most efficient way to clean.
Work one room at a time. Grab a microfiber cloth dampened with vinegar for glass, a microfiber cloth dampened with natural oil for wood furniture and a microfiber cloth dampened with diluted natural dish soap to clean leather couches, electronics, switches, baseboards and other surfaces.
Start With Dusting - Look up! There may be cobwebs in the corners or ceiling. Use an extended duster to reach. Work your way down, dusting all of the particles from the top down.
Start with your closets: Pull out anything that you no longer use both old and unused. Those that are still in good condition keep them aside to either donate to charity or sell at garage sales. For the old worn out stuff that cannot be fixed or reused, throw it away.
De-clutter your life. We all fall into this habit of just storing things that are either too old or unused. De-cluttering our lives allows us to think clearly and create more space in our homes.
The rewards are unbelievable, for you, your loved ones and your environment.
Is it time to do some cleaning? You realize it could take some hard work. You may not know where to start. Put on some music to pump you up, because you are going to get a full body workout.
Did you know? We now hand-make almost 100% of our cleaning solutions so that we can ensure we are using only green products?
Toss Detergent Cap in the Wash So It Never Gets Messy
This tip is probably the simplest. Detergent caps are strong enough to survive the wash cycle so rather than dealing with the gooey mess that builds up over time, just throw it in with the clothes and it always stays clean. I usually save the cap from a detergent jug to use for the laundry so I can replace the cap on the detergent in case it gets bumped over.
Fun Tip For Washing A Large Water Container:
a. Add water to fill the bottom of the container. Add a drop of dish soap. Add ¼ cup of rice.
b. Shake it up! The rice and dish soap will clean the buildup on the inside of the bottle.
c. Rinse it out until there are no more bubbles.
The feeling of a clean kitchen is priceless, it motivates many to prepare hearty meals. Go ahead and enjoy your sparkling clean kitchen while preparing your family’s favorite meal.
We recommend an all rubber broom. This way you can put rags in the bucket of solution mixed water, twist the rags so they are damp, and put it over the rubber broom to mop the floor.
Bicarbonate of soda as it’s commonly known is made from sodium carbonate or soda ash. It’s commonly used for cooking,medicinal purposes and cleaning. Just like vinegar, baking soda is multi-purpose and less costly, its cost is far less than any other specialized cleaning agent especially when purchased in bulk.
Lemons
The acid in lemon juice removes dirt and rust stains. It’s especially effective when mixed with salt, which makes “an excellent scouring paste,” says Karyn Siegel-Maier, author of The Naturally Clean Home.
Tip :Plastic food-storage containers: To bleach stains from tomato soup and other acidic foods on dishwasher-safe items, rub lemon juice on the spots, let dry in a sunny place, then wash as usual.
Cleaning windows tips:
1. Remove any built up dust
Start by tying back or removing any curtains or blinds and use a dust pan brush or broom handle to brush around the window corners and window sill to eliminate any laying dust.
2. Start by washing your window with a sponge
Washing up liquid in warm soapy water will work well but remember – the fewer suds the better. Be careful when using strong window cleaning solutions that they do not damage surrounding paintwork.
3. Wipe off the excess water
With a clean squeegee, starting at the top of the window and work your way down in a reverse-S pattern for maximum efficiency. Regularly wipe the squeegee blade clean with an old rag to avoid transferring the dirt around.
4. Remove any remaining water
Use damp, wrung-dry chamois or microfiber cloth to remove any remaining water from the glass. Finally dry the windowsill beneath where any water may have dripped down.
5. Wash windows on a cloudy day
Although direct sunlight makes it easier to see the dirt, it also dries the windows too quickly, leaving streaks on the glass. Make sure you pick a cloudy day for your cleaning session (but if you’re doing the outside, beware of rain!).
6. Clean your windows at least twice a year
This will make a truly surprising difference to your whole room by making it lighter and brighter. You’ll be surprised at how dirty your windows can get.
How to Clean Your Microwave Floor and Turntable
To remove cooked-on spills from the floor or turntable of a microwave, make a paste of 2 parts baking soda to 1 part water and apply it to the hardened goop. After 5-6 minutes, wipe up the baking soda with a wet sponge or cloth and remove any residue with a paper towel.
Floor Surfaces Dust mop interior floors frequently using a clean non-treated dry dust mop. Sand, dirt and grit do the most damage to natural stone surfaces due to their abrasiveness. Mats or area rugs inside and outside an entrance will help to minimize the sand, dirt and grit that can scratch a stone floor. Be sure that the underside of the mat or rug is a non-slip surface. Do not use vacuum cleaners that are worn, the metal or plastic attachments may scratch the surface.
Use a old toothbrush for hard to reach areas around the soap holder, taps and drain.
Never use oven cleaner in a self-cleaning oven, as the product will clog the pores in the coating and may damage the coating.
Spray oven racks in a plastic garbage bag for easier cleaning.
Never clean a warm or hot light bulb with a damp cloth, as the bulb will shatter
To soften splatters inside the microwave, fill a cup with water and microwave on high for about two minutes. The steam will loosen any baked on food so it can be wiped cleaned.
Dampen a clean, soft paintbrush to remove dust from doors,, telephone keys, carved furniture ect .
A clean, damp cloth or rubber glove will remove pet hair from furniture upholstery.
To remove finger prints from stainless steel appliances, add a small amount of baby oil to a clean. Soft cloth and wipe the surface in the direction of the grain.
Always clean from top to bottom and left to right in whatever room you are cleaning. This is the quickest and most efficient way to clean.
Have a small kitchen? Here’s how to keep it clutter-free
There’s never enough counter space — but that’s especially true in a small kitchen. The solution: clever storage tricks.
A small kitchen means limited space to store your appliances and prep food. Here are six items that let you creatively store the things you need on daily basis in order to maximize counter and drawer space.
1. Cutting board Ditch the portable cutting board and try one that latches onto the edges of countertops so it fits in seamlessly with your existing counter, maximizing space.
2. Hanging pot rack Store things in places you wouldn’t normally consider such as the ceiling. Not only does this rack act as a beautiful centrepiece for your kitchen, it’s practical too.
3. Magnetic knife rack Keep your knives on display by mounting a magnetic knife rack to the wall. It’s efficient and stylish.
4. Stove-top coffee maker Espresso makers take up a lot of counter space, which is why we love stove-top coffee makers: They look great sitting on the stove, even when they’re not being used.
5. Storage holders Use glass jars to store dry necessity items such as rice and pasta that may not fit in your pantry. They look great lined up on a shelf or the counter. Free up drawer space with a vintage ceramic jug and matching salt box to keep your most-used utensils and seasonings in easy reach.
6. Small shelf If you have room, install a small shelf to free up pantry space and hold your most used spices and seasonings or favourite cookbook. We like this one because you can hang hooks from it to hold tea towels or mugs.
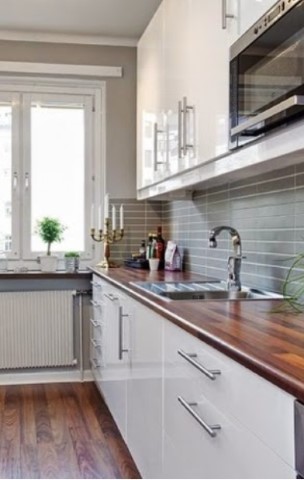
Staying ClutterFree
There's a belief among the clutter-afflicted that if they could only get rid of all the clutter, just once, the clutter problem is solved. Not quite that simple. Truth of the matter is, it's easier to maintain a decluttered environment than it is to achieve it, but there's more to the problem than the mere absence or presence of clutter. It doesn't arise out of nothing. If everyone in the family dumps book bags, briefcases, handbags and outer clothing on the living room sofa, clearing the sofa today isn't going to prevent tomorrow's deluge. Twenty-four
hours later, the clutter has returned. Once clutter has been banished, the real work of change begins. To conquer clutter once and for all, focus on these clutter prevention ideas:
A primary cause of clutter? It's the homeless...mail, toys, or newspapers. Without a home, common household items wander, lose their way, meet up with bad companions and make the transition to clutter. Assign a designated area for your stuff. Newspapers may be folded and stacked on a coffee table before being read,
then given shelter in a box while they await recycling, a location for purses, school papers, back packs and briefcases. Give paperwork proper files so it never has to huddle in lonely stacks on kitchen counters. With assigned spaces, good stuff will never become bad clutter.
Establish Clutter Preserves - There's no such thing as clutter-free living. Even the tidiest among us still tosses clothing on floors from time to time. Accept reality by establishing dedicated clutter preserves so long as it stays within boundaries. In a bedroom, one chair becomes the clutter preserve. Clothing may be thrown with abandon, so long as it's thrown on the chair. A kitchen junk drawer can house vitamin bottles, rubber bands, clipped recipes, expired coupons and shopping receipts unwelcome outside their clutter preserve. Children may use a flat-bottomed plastic laundry basket to corral stray playthings in bedroom or family room. A large magazine bucket in the living room is fair game for catalogs and magazines, so long as they can fit inside the bucket.
Build Good Habits To Rid Off Clutter - Focus on stuff-related household activities to get a handle on the clutter process. Build good habits to choke off the tendency to create clutter. As you shut the back door, hang the car keys on a hook just above the light switch. Remove jackets and coats two steps inside the house, and hang them on the coat rack. Place purse or briefcase in the launch pad area next to the coats.Bringing in the mail? No more slumping down any old where to review the day's catch. Instead, form a new habit: sort mail over the trash can, dumping the junk, then file it quickly in a plastic pocket filing unit on the adjoining wall. Habits, once adopted, kick in as a mindless protective device. To stay clutter-free, work hard on new clutterbusting habits as you declutter.
One In, One Out - For more exotic clutter contenders, adopt a one-in, one-out rule. When you buy a new pot, shirt or magazine, an old pot, shirt or magazine must be discarded, recycled or donated. One-in, one-out keeps the level of stuff below the clutter point by limiting total numbers. Want to bump up downsizing? Adopt a variation of the rule: One In, Two Out. You'll reduce surplus stuff painlessly. Observing the One In, One Out rule can also save money. Buying takes on new importance when one of your current favorites will have be discarded as a result.
Outsource It - Finally, focus on out-of-house resources to whittle down the sheer number of things that enter home. For example, there's no need to buy, keep, sort and store back issues of magazines once you realize that the public library provides this very service for free! Rent, don't buy, paint sprayers and specialty tools for home repair projects. Swap garden tools or hobby equipment with a neighbor. Borrow books, CDs, and videos from the library or video rental store. The less you permit stuff to get a foot in the door, the less clutter will grow in your organized home!
10 Secrets to Cleaning Your Home in Half the Time
1. Have a System - means cleaning the house in the same order every time: Working one room at a time, starting and finishing at the same spot in a room so that you don't waste time running back and forth. The routine is the method, and that is an inherently better way to clean because the speed comes from the method instead of from hurrying.
2. Clean Top to Bottom, Left to Right - Don't start a room by wiping the coffee table, then clean the blinds, and seeing the dust from the blinds coat your newly clean coffee table. Start at the top of the room, such as dusting a ceiling fan, and work down to the floor to eliminate redundant work. Likewise, cleaning left to right ensures that you cover the entire room instead of darting from place to place.
2. Clean Top to Bottom, Left to Right - Don't start a room by wiping the coffee table, then clean the blinds, and seeing the dust from the blinds coat your newly clean coffee table. Start at the top of the room, such as dusting a ceiling fan, and work down to the floor to eliminate redundant work. Likewise, cleaning left to right ensures that you cover the entire room instead of darting from place to place.

3. Squeegee Windows for a Streak-Free Finish - Place a drop of dish soap in a gallon of water, wipe it generously on the window with a cloth, then squeegee it off. Go top to bottom and wipe the blade each time at the bottom. If you don't want a squeegee, a glass cleaner and a microfiber cloth is an option. When wiping with the cloth, use horizontal strokes and move from top to bottom. Don't clean a window by rubbing in circles, which can leave streaks, and avoid wiping the glass with newspaper or paper towels, which leave a residue.
4. Keep Proper Tools Ready - Having all the tools and cleaning products you need at arm's-reach means you won't waste time walking back and forth to the cabinet under the sink. Sardone recommends wearing an apron, or even a carpenter's tool belt, and filling the pockets. This might be hard with several large bottles of cleaner, but you don't need large bottles—pour the cleaners into small spray bottles that are easy to carry. You can also place your supplies in a caddy or a bucket to stay organized and save time.
5. Cut Through Kitchen Grease - Grease inevitably ends up on kitchen cabinets, especially those above or next to the range. You can buy a cleaner with orange oil to wipe off the grease, or you can use a standard grease-cutting dishwashing detergent. The detergent will cut through the grease on the cabinets just like it does with dishes.
Mix one tablespoon of liquid detergent with a gallon of warm water. Test the solution in an inconspicuous area, wiping it on with a clean sponge or cloth, to make sure it won't damage or discolor the finish. Then rinse it off with a different sponge and clear, warm water.
For tough stains or buildup that won't come off with detergent, mix baking soda with water and lightly scrub the problem area with a cloth.
6. Battle Bathroom Mold - Mold haunts bathrooms that aren't well-ventilated because water remains on the walls after bathing. Use hydrogen peroxide in a trigger-spray bottle to battle mold and mildew
7. Defeat Mineral Deposits - If mineral deposits from hard water have stained your plumbing fixtures, don't clean them with bristle brushes or pads. They can scratch the faucet. Instead, use white vinegar. Pour some on a clean cloth and wipe the faucets. It doesn't take much effort to make them sparkle.
8. Make Friends With Magic Erasers - Eraser is ideal for cleaning walls and almost any floor surface, including wood, laminate, and tile.
9. Clean the Microwave Like a Champ - The inside of your microwave probably looks like a war zone, and baked-on food, especially if it has been sitting for days or longer, can be tough to remove.
The trick: Have the microwave help you. Put a coffee cup full of water in the microwave and heat it up until it's boiling hot. This creates moisture that loosens up anything on the top, sides, or bottom of the microwave. Then take a damp cloth and wipe the surfaces clean.
10. Vacuum in Rows - Do the entire length of the room in a straight row, then move over and start again at the front of the room. Vacuum high traffic area once a week.
QUICK AND EASY CLEANING TIPS
:
In The Kitchen
1. Circle Your Way Around: Always begin on the right side of your stove, then move clockwise around the room. The stove is typically the dirtiest part of the kitchen, so ending with it keeps you from spreading dirt and grease. (First, soak drip pans and knobs in warm soapy water. By the time you've worked your way around, they'll be easier to clean.)
2. Sanitize the Sink: It's hard to believe, but your dirty kitchen sink has more bacteria than your toilet seat. Use a product labeled as an EPA-registered disinfectant, or make your own. To disinfect, clean your sink with soap and water first, then spray a mist of vinegar followed by a mist of hydrogen peroxide, and let air-dry. (Don't mix the vinegar and hydrogen peroxide together—spray one after the other.) If your sink is stainless steel, make it sparkle afterward by putting a few drops of mineral oil on a soft cloth and buffing. This prevents water buildup, which deters mold and keeps the sink looking clean longer.
3. Do Dishwasher Duty:: Once a week, shake baking soda on a damp sponge and wipe around the machine's edges to remove stuck-on food or stains.
4. Crumple Paper Towels…Forever: Use microfiber cloths instead. When wet, they sanitize and clean floors, counters, glass and tile, and eliminate the need for other cleaning products.
Sweeping Solutions
1. Cleaning should always be done top to bottom. That way, any crumbs or dust that fall to the floor while you're working get picked up last. And believe it or not, there's a right way to sweep.
2. Pick the Right Broom: For indoors, choose one with finer bristles to pick up smaller dirt particles. For outdoors, go for stronger, stiffer bristles, which work better to clear porous surfaces.
3. Get Swept Away: To sweep, hold the broom like a canoe paddle, with one hand on top of the handle and the other toward the middle. Push your hands in opposite directions to get the most out of every sweeping stroke. Sweep from the outside in so that you don't miss any spots, and move the dirt to the center of the room, where it will be easy to pick up.
4. Super Storage: Store brooms with the handle down. It makes them easier to find and protects the bristles.
5. Banish Dust Bunnies: Pick the proper dustpan. Minimize that annoying line of dust by choosing a dustpan with a rubber edge.
4. Super Storage: Store brooms with the handle down. It makes them easier to find and protects the bristles.
5. Banish Dust Bunnies: Pick the proper dustpan. Minimize that annoying line of dust by choosing a dustpan with a rubber edge.
Spring cleaning tips
Spring cleaning is a big deal for many people. It helps de-clutter after the big holiday season, it reduces junk and build up of unnecessary belongings, and makes everyone feel clean and ready for summer! Spring cleaning isn’t always an easy task, especially if you have a lot of stuff or a big house. These spring cleaning tips will help you minimize clutter, and free up more space in your home to make you feel organized!
Start From the Top
Work your way from your attic to your bottom floor. When cleaning you should always start at the top, whether you are starting from the top of a bookshelf or the top of your windows, working your way from the top to bottom is the best way to get your home the cleanest. When you start spring cleaning your attic, it also makes it easier to make room for what you will remove from the bottom floor of your home. If you don’t have an attic, just start at the main rooms in your home and go from there.
Tackle the Big Projects First
Tackle big projects in your spring cleaning project first. The bigger the room or cleaning job, the more work you have. If you target that first you will feel much better once you reach the smaller cleaning jobs, like doing dishes or storing excess belongings. Organizing also makes things seem a lot less intimidating and more comfortable. Some people report sleeping better when everything is organized!
Leave No Dirt Behind
It may take a few days to get everything clean, but it’s worth it. If you skip over rooms or surfaces then visitors will notice. Clean and organize every drawer and desk and cupboard. Get into the small areas as well. Not only will cleaning every crevice keep out dangerous dust, but you can also rest assured that your air will be cleaner and healthier to breathe
.
Cleaning Out Your Closet Doesn’t Have to Be Hard
Cleaning Out Your Closet Doesn’t Have to Be Hard
Every closet needs a good cleaning, and clothes and clutter can make it more disorganized than needed. Compression storage bags make it easy to store more in one small spot. They use a vacuum to suck out the extra air and really free up a considerable amount of space. This is a great way to store winter clothes and blankets, and frees up tons of space! Once you reduce that space everything is much easier to manage. Donate any clothes you haven’t worn in 6 months to charity. Forget about the clothes you say you will wear when you lose 20 pounds.

Other Tips to Follow:
-If you are on a budget then try making homemade spring cleaning solutions. Use fresh lemon juice, water, and baking soda. These three ingredients can clean almost everything and do a great job at leaving a fresh scent behind.
-Buy compact storage containers such as space bags. They can be used to make big blankets more compact and easily stored. You can even store your winter comforters under the bed and out of your way. These protect your belongings from damages.
-Having a yard sale is one of the best ways to do a large amount of spring cleaning. Once you clean your entire house you can have a huge sale and make profit off of your old clutter. It’s one of the best ways to reduce and recycle your excess junk.
Outdoor Spring Cleaning Tips
When you clean outdoors it is important to reduce all of the dead plants that were left behind by winter. Not everyone will need to do that because not every place actually loses their plant life. Cleaning up weeds and gutters is the best way to prepare your yard and home for a great summer garden.
-Rake, shovel, and rearrange your yard. Early spring is the best time to clean and get everything ready for a garden.
-Clean gutters thoroughly and wash the windows on the outside. If you have grungy siding clean your home on the outside as well.
Spring cleaning is often considered a ritual for many. It celebrates the end of a long cold winter and encourages the warm summer ahead to come faster. Spring cleaning tips can help you develop a great plan to get organized before the summer comes. Cleaning inside and outside is necessary for an all around clean. Cleaning your yard is an especially great opportunity to prepare your garden for the summer!
Copyright Topaz Cleaning 2023